Your Easy Guide to Designing the Perfect Open Kitchen
Designing the perfect open kitchen is easier than you think. This guide covers layouts, lighting, materials, and more to help you build a seamless, modern space.
First Things First: Understanding the Open Kitchen Dream
Before diving into layouts and materials, defining the core concept of an open kitchen and evaluating its suitability for your home is the foundational first step. This section establishes what an open kitchen is, weighs its benefits against its drawbacks, and provides visual inspiration for your project.
What Exactly Is an Open-Concept Kitchen?
An open-concept kitchen is a floor plan that eliminates interior walls to combine the kitchen with adjacent living spaces, such as a dining room or family room. This architectural style creates a single, large, multi-functional area often called a “great room.” Unlike a traditional closed kitchen, which is confined to one room, an open layout promotes a sense of spaciousness, improves the circulation of natural light, and fosters social interaction. The design uses structural elements, like large kitchen islands or peninsula counters, and decorative cues, like consistent flooring, to define the kitchen’s functional boundaries without physical separation.
The Pros and Cons: Is an Open Kitchen Right for Your Lifestyle?
Evaluating the distinct advantages and disadvantages of an open kitchen is crucial to determine if this popular layout aligns with your daily habits and household needs. An open kitchen plan offers significant lifestyle benefits but also presents unique practical challenges.
5 Key Advantages of an Open Kitchen:
- Improved traffic flow for entertaining guests and daily family movement.
- Enhanced social interaction, allowing the cook to engage with family and visitors.
- Increased natural light, as light from adjoining rooms flows freely into the kitchen space.
- A perception of greater square footage, making smaller homes feel larger and more airy.
- Higher potential resale value due to its consistent demand in the modern real estate market.
5 Key Disadvantages to Consider:
- Uncontained cooking odors and smoke that can permeate the entire living area.
- Increased noise transmission from appliances, such as dishwashers and blenders, into living spaces.
- Constant visibility of kitchen mess, including dirty dishes and countertop clutter.
- Reduced wall space, which limits storage capacity for traditional upper cabinets and shelving.
- A potential lack of intimacy or defined separation between functional home zones.
 Pin
Pin A Gallery of Open Kitchen Design Ideas to Inspire You
Visual inspiration is a critical step in defining the aesthetic for your project. The following gallery showcases 5 distinct open kitchen design styles to help you identify the materials, color palettes, and layouts that align with your personal taste. Observe how each style uses islands, lighting, and finishes to create a unique yet cohesive space integrated with the home’s primary living areas.
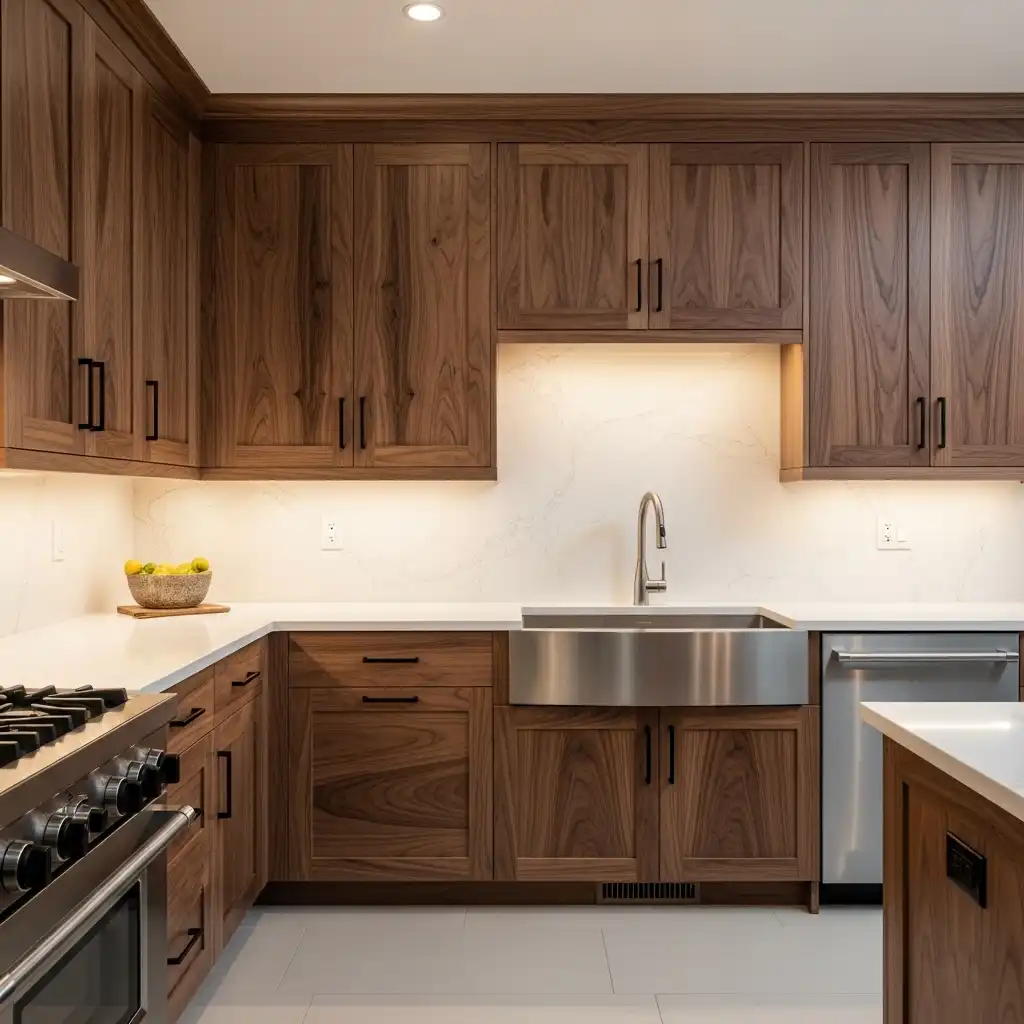
- Modern Farmhouse: Characterized by shaker-style cabinets, large apron-front sinks, natural wood accents, and a warm, neutral color palette.
- Industrial Loft: Features exposed structural elements like brick walls or ceiling beams, concrete or stainless steel countertops, open metal shelving, and factory-style pendant lights.
- Scandinavian Minimalist: Defined by clean lines, handleless flat-panel cabinets, light wood tones like ash or birch, and a focus on uncluttered functionality.
- Coastal Chic: Incorporates light and airy colors, such as whites, soft blues, and sandy beiges, along with beadboard details and natural textures to create a relaxed feel.
- Mid-Century Modern: Employs flat-panel wood cabinetry, often in walnut or teak, geometric patterns, organic shapes, and bold pops of accent color.
 Pin
Pin The 5-Step Process to Designing Your Open Kitchen
Executing a successful open kitchen design follows a logical progression from foundational planning to the final material selections. This 5-step process breaks down the complex project into manageable stages, ensuring every decision contributes to a functional and cohesive final space. Each step builds upon the last, moving from the invisible structure of the layout to the tangible surfaces you interact with daily.
Step 1: Plan Your Layout and Master Your Space
The foundation of any successful kitchen is its layout. This initial planning stage focuses on arranging the core components of your kitchen to optimize the available square footage for both efficiency and comfort. Proper layout planning addresses traffic flow, accessibility, and the overall usability of the integrated living area.
Choosing Your Core Layout: L-Shape, U-Shape, or Galley with an Island
Your kitchen’s core layout is the primary determinant of its workflow and is dictated by your room’s specific dimensions. The 3 most effective layouts for open-concept plans offer distinct advantages.
- L-Shape Layout: This design uses two adjacent walls for countertops and cabinets, making it an efficient choice for corner spaces and leaving ample room for a dining area or large island.
- U-Shape Layout: This layout utilizes three walls in a U-formation, providing extensive counter space and storage. In open plans, one leg of the “U” is often a peninsula that helps define the kitchen’s boundary.
- Galley Layout with Island: A modern adaptation of the two-wall galley kitchen, this design features one primary wall of cabinets and appliances opposite a large island, creating a highly efficient corridor for cooking while keeping the space open.
Mapping the Kitchen Work Triangle for Perfect Flow
The kitchen work triangle is an ergonomic principle that establishes an efficient movement path between the 3 primary work centers: the sink, the refrigerator, and the cooktop. To optimize workflow, the sum of the three triangle legs measures between 13 feet (4 meters) and 26 feet (8 meters). Each leg of the triangle is between 4 feet (1.2 meters) and 9 feet (2.7 meters) long, ensuring each key station is accessible without being too far apart. A well-planned work triangle has unobstructed paths to prevent traffic jams during food preparation.
 Pin
Pin Creating Functional Zones: Prep, Cook, Clean, and Socialize
Zoning organizes your open kitchen into task-specific areas to ensure multiple activities can occur simultaneously without interference. This approach assigns a purpose to every part of your layout, improving organization and workflow. A typical open kitchen contains 4 primary zones.
- The Prep Zone: Located with easy access to the refrigerator and sink, this area provides ample counter space for food preparation tasks like chopping vegetables.
- The Cooking Zone: Centered around the stove, cooktop, and oven, this zone includes nearby storage for pots, pans, and spices.
- The Cleaning Zone: This area contains the sink, dishwasher, and waste bins, consolidating cleanup tasks into one location.
- The Social Zone: Typically centered around island seating or a peninsula bar, this zone provides a dedicated space for guests and family to interact with the cook without entering the primary work zones.
Step 2: Solve the Top 3 Practical Challenges
An open kitchen’s greatest strengths—its connection to living spaces—also create its main practical challenges. Addressing storage, ventilation, and noise at the design stage is essential for long-term satisfaction and functionality.
Smart Storage Solutions for a Clutter-Free Space (Pantries, Deep Drawers, and Appliance Garages)
The solution to the reduced wall space in an open kitchen is maximizing vertical storage and integrating specialized cabinetry. This strategy compensates for the lack of upper cabinets and helps maintain a tidy appearance. Effective storage solutions include several key types.
- Floor-to-Ceiling Pantry Cabinets: These tall units offer immense storage capacity with features like pull-out shelves for easy access.
- Deep Base Cabinet Drawers: Ideal for storing heavy items, such as pots, pans, and small appliances, deep drawers are more ergonomic than standard base cabinets.
- Appliance Garages: A designated cabinet with a lift-up or retractable door, an appliance garage conceals everyday items like toasters and blenders, keeping countertops clear.
The Definitive Guide to Kitchen Ventilation (Range Hoods vs. Downdraft Systems)
Proper ventilation is non-negotiable in an open kitchen to manage cooking odors, smoke, and airborne grease particles. The effectiveness of a ventilation system is measured by its Cubic Feet per Minute (CFM) rating, which indicates how much air it moves. The two primary ventilation systems offer different applications.
- Range Hoods: These canopy-style hoods are installed directly above the cooktop and are the most effective option, particularly for high-output gas cooktops. They capture contaminants at the source before they can disperse.
- Downdraft Systems: Integrated into the cooktop or countertop, these systems pull air downwards. They are a minimalist choice for kitchen islands where a large hood is visually undesirable, and they function best with electric or induction cooktops.
Simple Tips for Reducing Appliance and Activity Noise
A strategy for mitigating noise transmission involves selecting quiet-rated appliances and incorporating soft, sound-absorbing materials into the overall design. An appliance’s noise level is measured in decibels (dBA); a dishwasher rated below 45 dBA is considered exceptionally quiet. To further reduce ambient noise, homeowners integrate sound-dampening elements, such as large area rugs, upholstered bar stools, fabric window treatments, and even decorative acoustic panels.
Step 3: Create a Cohesive Style from Floor to Ceiling
Achieving a seamless visual transition between the kitchen and adjacent living areas is the primary aesthetic goal of an open-plan design. This cohesion is created through the deliberate repetition of color, materials, and finishes across the entire space.
 Pin
Pin Choosing a Unifying Color Palette That Connects Your Spaces
The most effective method for visual integration is using a consistent 3-color palette across the entire open-plan area. The 60-30-10 decorating rule is a proven framework for this.
- 60% Dominant Color: This color, typically a neutral shade, is used for the majority of the walls.
- 30% Secondary Color: This color is applied to elements like kitchen cabinetry, an accent wall, and major furniture pieces.
- 10% Accent Color: This final color provides small pops of interest on items such as backsplash tiles, decor, and throw pillows.
Seamless Flooring to Create a Harmonious Flow
The best practice for creating a harmonious flow is installing a single type of flooring material throughout the kitchen, dining, and living areas. This continuous surface eliminates visual breaks and makes the entire space feel larger and more unified. Durable and water-resistant materials are ideal for this application; popular options include several types, such as engineered hardwood, laminate, and Luxury Vinyl Plank (LVP).
Matching Cabinetry and Finishes with Your Living Area Decor
Cohesion is reinforced by repeating specific design elements, such as cabinet door styles or hardware finishes, in the adjoining living space. For instance, the brushed brass finish of the kitchen cabinet pulls can be mirrored on the hardware of a living room media console. Similarly, a living room with built-in bookshelves can be designed with doors that match the kitchen’s shaker-style cabinetry, creating a consistent design language.
Step 4: Develop a Layered Lighting Plan
A successful lighting plan in an open kitchen requires more than a single overhead fixture. A layered approach combines 3 distinct types of lighting to ensure the space is both beautifully illuminated and highly functional for every task.
Ambient Lighting for Overall Brightness
Ambient light is the general, foundational layer of light that illuminates the entire space, providing safe and comfortable visibility. This is typically achieved with unobtrusive fixtures, such as recessed lighting cans or flush-mount ceiling fixtures, installed in a grid pattern and controlled by dimmer switches to adjust the room’s overall mood.
Task Lighting for Essential Workspaces (Under-Cabinet & Pendants)
Task lighting is focused, bright light directed at specific work areas to ensure safety and prevent eye strain during food preparation. This critical layer illuminates the most important surfaces. Common applications include several types.
- Under-cabinet LED strips to light the countertops directly.
- Pendant lights hung over the kitchen island or peninsula.
- A dedicated light source above the sink.
Accent Lighting to Highlight Your Kitchen’s Best Features
Accent lighting is directional light used to draw attention to specific architectural or decorative elements, creating visual interest and depth. This final layer adds a touch of drama and personality to the design. Accent lights are used to highlight features, such as a textured backsplash, a piece of artwork on a nearby wall, or glassware displayed in glass-front cabinets.
Step 5: Select Durable and Beautiful Materials
The final design step involves choosing the surfaces that you will see and touch every day. Your material selections for countertops, cabinets, and the backsplash have the greatest impact on your kitchen’s durability, maintenance requirements, and overall style.
Comparing Countertop Materials: Quartz vs. Granite vs. Marble
Choosing a countertop material involves balancing aesthetics with performance. The 3 most popular stone countertop options have key differences.
- Quartz: This engineered stone is non-porous, highly durable, and requires no sealing, making it a low-maintenance choice with consistent color and pattern.
- Granite: A natural stone prized for its unique patterns, granite is highly heat-resistant but is porous and requires periodic sealing to prevent stains.
- Marble: Renowned for its luxurious look, this natural stone is softer and more porous than granite, making it prone to scratching and etching from acidic substances.
 Pin
Pin A Guide to Cabinetry Styles and Finishes
The style and finish of your cabinetry are the primary drivers of your kitchen’s overall aesthetic. The door profile sets the design tone; the 3 main styles are Shaker for transitional looks, flat-panel for modern designs, and raised-panel for traditional homes. These styles can be paired with numerous finishes, such as a durable painted finish for a pop of color, a classic wood stain to highlight grain, or a sleek thermofoil for a contemporary look.
Choosing the Right Backsplash to Tie Everything Together
A kitchen backsplash serves a dual role: protecting the wall behind the sink and cooktop from moisture and grease, and acting as a key decorative focal point. The backsplash presents an opportunity to inject personality into the design. Material choices are extensive and include many options, such as classic ceramic subway tile, intricate glass mosaic tile, or a seamless full-height stone slab that matches the countertops. The choice of material, color, and grout completes the kitchen’s visual story.
Pro-Level Planning: Budgets, Tools, and Expert Advice
With the core design steps established, the final phase of planning involves mastering the financial and technical details that elevate a good kitchen to a great one. This section provides the expert-level advice, tools, and foresight needed to manage your budget effectively, make smart material choices, and avoid common costly mistakes.
How to Budget Your Open Kitchen Remodel (with Sample Cost Breakdowns)
A successful kitchen remodel requires a detailed budget that allocates funds across 10 primary categories and includes a contingency fund for unexpected issues. A typical kitchen renovation budget is distributed with cabinetry and hardware representing the largest portion at 29%, followed by installation labor at 17%, and appliances at 14%. A contingency fund of 15-20% of your total budget is critical to cover unforeseen costs, such as discovering hidden plumbing leaks or needing to update old electrical wiring.
 Pin
Pin Sample Budget Allocation for a $25,000 Project:
- Cabinetry & Hardware: $7,250 (29%)
- Installation & Labor: $4,250 (17%)
- Appliances & Ventilation: $3,500 (14%)
- Countertops: $2,500 (10%)
- Flooring: $1,750 (7%)
- Lighting & Electrical: $1,250 (5%)
- Plumbing: $1,000 (4%)
- Design Fees: $1,000 (4%)
- Paint & Miscellaneous: $500 (2%)
Where to Save vs. Where to Splurge for the Best ROI
Maximizing your return on investment (ROI) involves a strategic financial approach: save on easily replaceable decorative elements and splurge on high-use, long-lasting functional components. This method ensures your budget is allocated to the items that most impact your kitchen’s daily performance, safety, and durability.
3 Key Areas to Save Money:
- Cabinetry: Opt for widely available stock or semi-custom cabinets instead of fully custom options.
- Backsplash: Install a classic, affordable ceramic subway tile backsplash yourself to save on material and labor costs.
- Demolition: Perform non-structural demolition, such as removing old cabinets, countertops, and flooring, on your own.
3 Essential Areas to Splurge:
- Countertops: Invest in durable, high-quality countertops like quartz, as they are the kitchen’s primary and most visible work surface.
- Ventilation & Core Appliances: Purchase a powerful, quiet range hood and energy-efficient appliances that you will use every day.
- Professional Installation: Hire qualified and insured plumbers and electricians to ensure all work is safe and compliant with local building codes.
Expert Recommendations: Choosing the Right Appliances & Materials
In an open-plan home, the technical specifications of your appliances and materials directly impact the comfort of your entire living area. Making informed choices based on performance metrics is essential.
Example: Selecting a Quiet Dishwasher (Decibel Ratings Explained)
The key metric for dishwasher noise is the decibel rating (dBA), where a lower number indicates a quieter appliance. For an open-concept kitchen, a dishwasher rated at or below 44 dBA is considered whisper-quiet and will not disrupt conversations or television watching in the adjacent living room. Dishwashers in the 38-44 dBA range are an excellent investment for maintaining a peaceful environment.
Example: Calculating the Right CFM for Your Range Hood
For gas cooktops, the standard formula for calculating ventilation power is to provide 1 CFM of ventilation for every 100 BTUs of the cooktop’s total power output. For example, if a gas range has four burners rated at 15,000 BTUs each (a total of 60,000 BTUs), the required ventilation power is 600 CFM (60,000 / 100). For electric or induction cooktops, a simpler calculation of multiplying the cooktop width in inches by 10 is often used.
7 Common Open Kitchen Design Mistakes and How to Avoid Them
Avoiding the 7 most common design mistakes ensures your kitchen is both beautiful and highly functional. These errors typically stem from poor spatial planning or overlooking the practical realities of an open-concept space.
- Inadequate Lighting: Relying on a single overhead light fixture, which creates shadows and a dim workspace. Solution: Implement a layered lighting plan with dedicated ambient, task, and accent lights.
- An Undersized Kitchen Island: Creating an island that is too small for both food prep and guest seating. Solution: Ensure a minimum of 24 inches of linear counter space per seat and at least 36 to 42 inches of clearance on all working sides of the island.
- Ignoring the Work Triangle: Placing the sink, stove, and refrigerator too far apart or with major obstructions in the path. Solution: Map the work triangle early in the design phase and keep pathways clear.
- Insufficient Landing Space: Lacking clear counter space next to the refrigerator, oven, and microwave for loading and unloading items. Solution: Plan for at least 15 inches of unobstructed counter space beside these key appliances.
- Choosing Style Over Function: Selecting materials that look appealing but cannot withstand daily use, such as a soft marble countertop in a busy family kitchen. Solution: Prioritize durable, low-maintenance materials for high-traffic surfaces.
- Forgetting About Outlets: Not planning for enough electrical outlets, especially on the kitchen island. Solution: Incorporate multiple outlets, including options with USB ports, into the island sides and backsplash during the electrical planning phase.
- Overlooking Trash and Recycling: Having no integrated solution for waste disposal, leading to freestanding bins that clutter the space. Solution: Designate a pull-out cabinet, typically next to the sink, for hidden trash and recycling bins.
Download Your Free Kitchen Planning Checklist [PDF Link]
To consolidate every step of this guide into an actionable format, download Your Free Kitchen Planning Checklist. This comprehensive resource helps you track your budget, design choices, material selections, and project timeline from start to finish.
Frequently Asked Questions (FAQ)
How do you hide the mess in an open-concept kitchen?
Hiding mess in an open-concept kitchen relies on 3 primary design strategies: using clever storage to conceal items, choosing surfaces that camouflage minor spills, and creating subtle visual barriers. A deep, single-basin sink, for example, is effective at hiding dirty dishes from view below the counter line. Key design solutions include several specific elements.
Appliance Garages: These dedicated cabinets conceal everyday countertop items like toasters and coffee makers behind a retractable door.
Integrated Waste Bins: A pull-out cabinet for trash and recycling eliminates freestanding cans and their associated clutter.
A Raised Bar Counter: A two-tiered island with a higher bar (42 inches) on the living room side effectively screens the main work surface (36 inches) from view.
Textured or Patterned Countertops: Surfaces with natural veining or patterns, such as granite or many quartz designs, are more forgiving of crumbs and minor spills than solid, dark-colored surfaces.
What is the best flooring for an open-plan kitchen and living room?
The best flooring for an open-plan kitchen and living room is a material that offers high durability, significant water resistance, and a visually continuous look to unify the entire space. Using a single flooring material throughout eliminates jarring transitions and makes the area feel larger. The 3 most recommended flooring options for this application balance performance and aesthetics.
Luxury Vinyl Plank (LVP): This engineered material is 100% waterproof, highly durable against scratches and dents, and realistically mimics the look of hardwood.
Engineered Hardwood: It provides the authentic look and feel of real wood but has a more stable core construction that better resists moisture and temperature changes than solid hardwood.
Laminate Flooring: Modern laminate offers excellent scratch resistance and realistic wood or stone visuals at a budget-friendly price point, with many varieties now featuring advanced water-resistance technology.
Can you have an open kitchen in a small space?
Yes, an open kitchen is an excellent design strategy for a small space because removing interior walls makes the entire area feel significantly larger and brighter. Instead of confining the kitchen to a cramped room, opening it up allows it to borrow square footage and natural light from the adjacent living area. To maximize a small open kitchen, designers use several key techniques.
A One-Wall Layout: Placing all cabinets and appliances along a single wall is the most space-efficient design for narrow rooms.
Light Color Palettes: Using colors like white, cream, and light gray for walls, cabinets, and countertops enhances the sense of space.
Reflective Surfaces: Incorporating glossy cabinet finishes, mirrored backsplashes, or polished metallic hardware helps bounce light around the room.
Scaled-Down Appliances: Choosing apartment-sized or “slimline” appliances, such as an 18-inch dishwasher or a 24-inch-wide refrigerator, saves valuable floor space.
Your Perfect Open Kitchen Awaits
Designing the perfect open kitchen is a process of integrating functional layouts with cohesive aesthetics. This guide provides a systematic path, moving from foundational layout planning and practical problem-solving to the final selection of materials and finishes. By applying the principles of spatial zoning, layered lighting, and strategic budgeting, you now possess the knowledge needed to create a space that is not only beautiful but also perfectly aligned with your lifestyle. A well-designed kitchen that enhances daily life and adds lasting value to your home is the direct result of this detailed preparation.

Olivia is a modern farmhouse enthusiast with a soft spot for coastal vibes and cozy spaces. She believes home should feel like a warm hug—and she’s always on the hunt for the perfect throw pillow. When she’s not styling rooms or lighting way too many candles, you’ll find her rearranging furniture “just to see how it feels.”